3D-Printed Frame for a 32×32 LED Matrix with Microphone
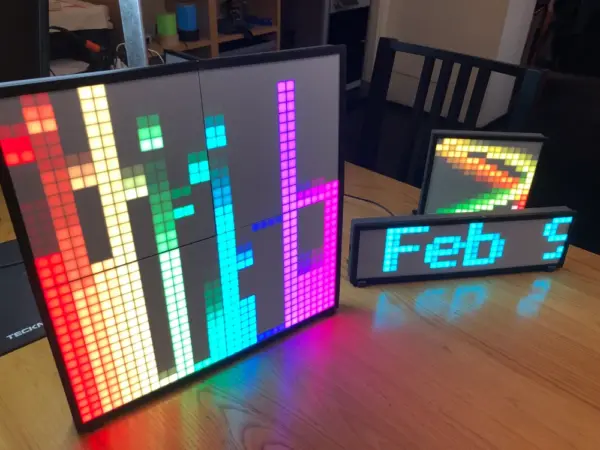
The frame for the 32×32 LED matrix turns 1024 pixels into a wall or desk display. The project by fractalnoise uses a 3D printer to create a modular frame. The project page shows a design made for the ESP-WROOM-32 and a MAX4466 or MAX9814 microphone. The result is an interactive display, ready for audio-reactive visuals or digital clocks.
The structure is split into four front pieces, four diffusers, and four angled back plates. Each part snaps together without glue, tape, or screws. The snap-fit joints hold everything in place precisely. However, the four front pieces need to be glued together to ensure rigidity at this size. The USB port of the ESP-WROOM-32 stays accessible, so you can update the firmware without taking anything apart.
How the frame assembly works
Assembly starts from the back, where the angled plates are inserted. Then the diffusers are attached, which soften the light from the LEDs. Finally, the front pieces close it up, locking everything with the snap-fits. The microphone connects directly to the ESP-WROOM-32, without the need for complex soldering. The DC connector allows you to power the matrix with a stable external voltage.
The diffuser recipe includes a scanline texture. This effect recalls old CRT monitors and reduces glare. The result is a more uniform image across the 1024 pixels. Additionally, the grid protects the LEDs from dust and accidental bumps. The project is therefore suitable for public installations or everyday use.
Why choose a 3D-printed frame
A 3D-printed frame offers advantages that commercial frames do not have. The design is customizable, so you can adapt it to your needs. Also, the material cost is low, especially if you use a printer like the Creality Ender-3 V3 SE. The screwless assembly reduces time and the tools required. Even a beginner can complete the project in under an hour.
Modularity is another strong point. You can print only the parts you need or replace a damaged diffuser. The structure adapts to different mounting configurations, on a wall or on a desk. The design has been tested for common print tolerances, so it works with most FDM printers. With a 0.8 mm nozzle you can speed up printing without losing detail.
Ideas for using the LED matrix with microphone
The MAX4466 or MAX9814 microphone opens up many creative possibilities. You can create an audio visualizer that reacts to music in real time. Or an ambient noise indicator for a studio or a bedroom. The 32×32 LED matrix offers enough resolution for text, graphics, and animations. The project integrates well with other displays, such as the 128×64 OLED display for secondary information.
For those who want to expand the system, there are many options. For example, you can add an SPI 256×64 OLED display for more detailed controls. Or a TDA7297 audio amplifier for sound feedback. The frame is designed to be expandable, so it does not limit your creativity. Also, the code for the ESP-WROOM-32 is easy to modify with Arduino or PlatformIO.
The project is ideal for makers who want an LED display without complications. 3D printing takes about 4-6 hours, depending on the settings. The required materials are inexpensive and easy to find. The final result is a robust and functional device, perfect for labs, offices, or bedrooms. The project page includes all STL files and step-by-step instructions.
- Four front pieces with snap-fit joints
- Four diffusers with scanline texture
- Four angled back plates
- Support for ESP-WROOM-32 and MAX4466/MAX9814 microphone
- DC connector for external power