
Battery Shield for Arduino – Solder-it-yourself Kit
SKU 8190-BATTERYSHIELDEAN 8219671065153Item type: Kit, Shields & add-onsArduino, Arduino compatible
Description
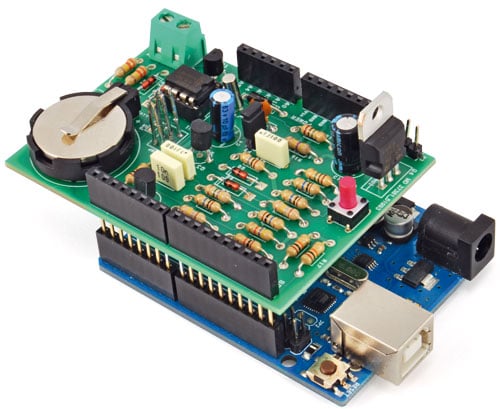
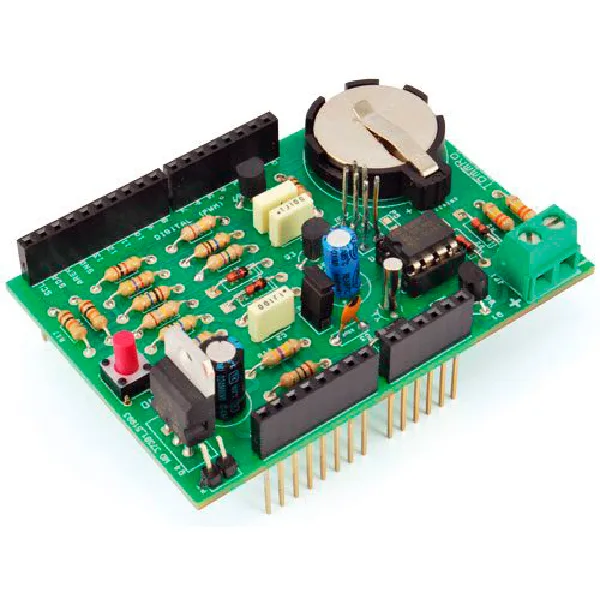
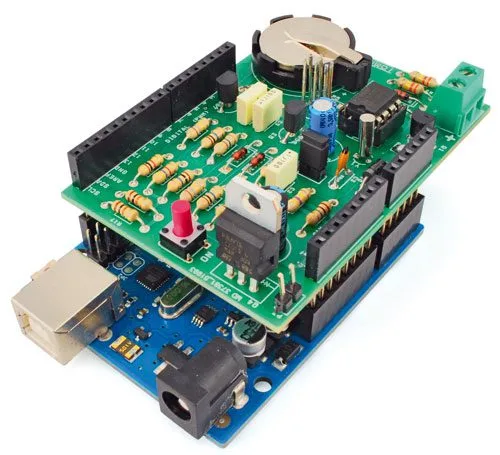
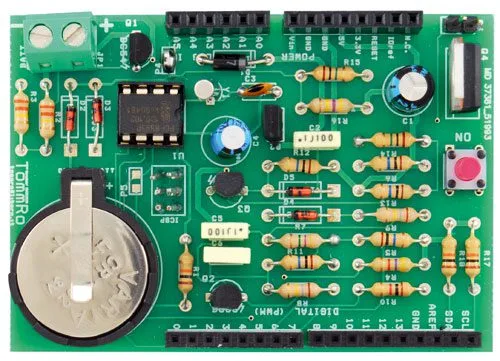
Shield for Arduino Uno, designed to receive at its input (through a screw terminal) the supply voltage from a battery (between 5 and 12 volts) and, exploiting a particular feature of the PCF8593T chip (a clock/calendar generally used as a clock and calendar), allows the system to be powered on at fixed intervals selectable by software depending on the conditions encountered. It allows the Arduino software to choose when to “be awakened” and, once on, through the state of a digital output, how long to stay on and finally when to turn off. The shield includes the PCF8593T chip, so it can also be used as an RTC shield to provide Arduino with the typical clock and calendar functions. The shield uses two digital pins (D6 and D7) to manage the power-on system; the I²C port for communication/programming of the PCF8593T component; it is possible (via jumper) to use the analog pin A0 to read the supply voltage from the battery in order to identify its charge level. In addition, there is a button to turn on Arduino even during scheduled off times (clearly the condition must be provided for in the software) and a jumper that, if inserted, will keep Arduino always on (a possibility to use for special cases; perhaps connected to a relay from a second board to implement particular applications). Note: Arduino is not included.
Operation
- the system is off from a given point in time;
- at a certain point the clock wakes Arduino; the latter decides to stay awake and proceeds to analyze its internal state as well as that of any external pins/sensors;
- after analyzing the inputs and updating the outputs, Arduino programs the clock indicating the instant at which it must be awakened and then decides to turn off;
- for all the remaining time the system stays off and at the next power-on the whole mechanism is repeated.
Arduino Battery Shield Library
As seen in the article, for the correct operation of the system it is necessary that all software be written keeping in mind how the power-on and power-off mechanism of the electronics is implemented.
To facilitate integration by end users we have created a software library that implements the basic functions. Both “low-level” functions are defined, including system initialization; turning Arduino on, self-powering, and turning it off; reading the analog value of the supply voltage; and “medium-level” functions, including starting the PCF8593T chip and programming the power-on instants; and “high-level” functions typical of a clock/calendar component, such as programming and reading date and time; checking for New Year (year increment); automatic switching from daylight saving time to standard time and vice versa, etc.
As we will see better later when analyzing the programming example, using these functions the programmer does not have to worry about direct hardware management but will have a software interface that takes care of it and hides all the related details.
The library defines a “Battery” object with the following public methods (i.e., usable in the Arduino program):
– void begin(): initializes pins D6 and D7 as digital inputs and outputs and also starts the clock if it is detected stopped;
– bool onFromButton(): in the analysis of the hardware schematic we saw that there is a button to turn on Arduino bypassing the clock programming; to distinguish whether the power-on was done by the PCF8593T or by pressing the button, the digital pin D6 of Arduino is used. Calling the onFromButton() function tests the state of D6 and consequently identifies whether the power-on comes from the button (function result true) or from the clock (result false);
– float getBatteryVoltage(): as seen when analyzing the shield’s electrical schematic, it is possible to select the use of Arduino’s analog pin A0 to detect the battery supply voltage. This function can be used to read that value; the function already performs all conversions and takes into account the various voltage drops due to the different components (in particular diode D15) and returns the battery voltage in float format (floating-point number);
– void startSecAlarmPCF8593, void startMinAlarmPCF8593, void startHourAlarmPCF8593: with these functions it is possible to select the instant of the next power-on event. In particular, it is possible to specify (taking as reference the instant of execution of the functions) respectively for how many seconds, minutes, or hours Arduino must remain off before being awakened by the clock. The functions accept as input a byte parameter whose valid values are only those between 1 and 99 inclusive;
– void writeClockANDDataPCF8593(): as mentioned, the PCF8593T component, in addition to being used to determine the power-on instants, can also be used as an RTC and clock/calendar. This function allows programming the current date and time (passed as parameters hours, minutes, seconds, day, month, and year). The function automatically determines and programs the day of the week and whether standard or daylight saving time is active;
– void readClockANDDataPCF8593(): unlike the previous function, it allows reading the current date and time indicated by the PCF8593T chip. As a calendar, the day, month, and year plus the day of the week are returned; as a clock, the hour, minutes, seconds, and hundredths of a second are returned;
– bool checkProgrammedPCF8593(): allows testing whether the clock/calendar of the PCF8593T chip has been started and programmed. If so, it returns true; if not, it returns false (in this case it must be started by calling the appropriate function);
– bool checkHourLegPCF8593(): allows checking whether for a given day (identified by day of the week, day, and month) standard or daylight saving time should be active (useful for automatically performing the corresponding switch);
– void checkNewYear(): tests whether the calendar has passed New Year and, if so, updates (increments by 1) the year number;
– byte getDayOfWeek(): determines the day of the week of a date (identified by day, month, and year);
– bool YearBisestile(): determines whether a given year is a leap year.
FIRST ARDUINO FIRMWARE
To understand the operation and programming logic to use with the battery shield, let’s look at two examples of Arduino code, the first of which is shown in Listing 1. The software simply programs the battery shield so that Arduino stays almost always off, turning on every 10 seconds and simulating the execution of a program (simulated via delay) and then turning off again waiting for the next execution cycle.
After including the libraries used (in particular the “Battery.h” specific to the shield), the digital pin for managing the LED on the Arduino board is defined, and a Battery object is also defined that will be used to manage the shield itself.
Technical details
| void powerON() | lowers pin D7 so that Arduino can stay on |
|---|---|
| void turnOFF() | unlike powerON(), raises pin D6 so that Arduino can turn off |
You may also like…
-
 Arduino
Related products
-
 Arduino
 -
 Control electronics
 -
 Arduino compatible
 -
 Displays
 -
 Arduino compatible
 -
 Development systems
 -
 Arduino
 -
Sale!
 Arduino compatible